The order management is the “meat and potatos” of Loonity: It gives you as a producer the possibility to process orders and prepare goods for the logistics process.
You can find 4 tasks in this section of the documentation. If you follow the tasks in order, you successfully complete commissioning the order so it will be ready for delivery. The tasks are highlighted in yellow.
How orders have to be handled depends on how the market that sent you the order is configured. Orders may have different delivery methods, documents and preparation times, so you have to pay attention while processing them.
In general, Loonity is set up in a way that you will recieve as little information as possible (e.g. you will not recieve an email for every order, but only one for every round), but enough for you to work efficiently. Pay attention to what is written on the documents (delivery notes, picking lists), follow market instructions and things will work smoothly.
To open the order management page, click “orders”, then “order management” in the collaborate section of the menu.
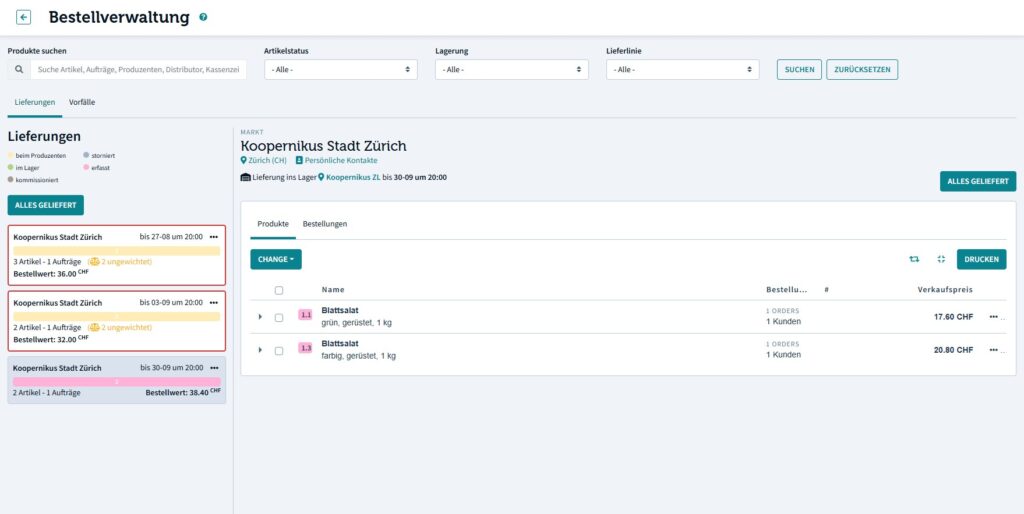
The order management page is organised according to the following principles:
Filtering #
In the top you have several filtering options available to filter the various views by product name, article status or logistics attributes.
Main Tabs #
There are two main views in the order management page:
- The deliveries tab shows you all upcoming delivery rounds and associated orders that need to be processed by you.
- The incidents tab shows you a list of all incidents opened on order items from you and allows you to process them.
Delivery rounds column #
While you are in the deliveries tab, the left column displays one box per upcoming delivery round. The box shows you summarized information about all orders contained in the respective delivery round: number of products and orders, processing deadline and total value.
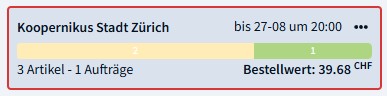
The colored line gives you a quick way to assess the status of a delivery round. It will be proportionally colored in the status that the products are in (see status cheat sheet to learn about status colors). In the above example there a total of 3 products in the delivery round, of which 1 has been processed and two are awaiting processing by you.
By clicking on a box, you select a delivery round and the orders will be displayed in the column to the right.
Orders column #
The orders column shows you all the necessary information you need to process the orders in a delivery round. You have two options to display the information:
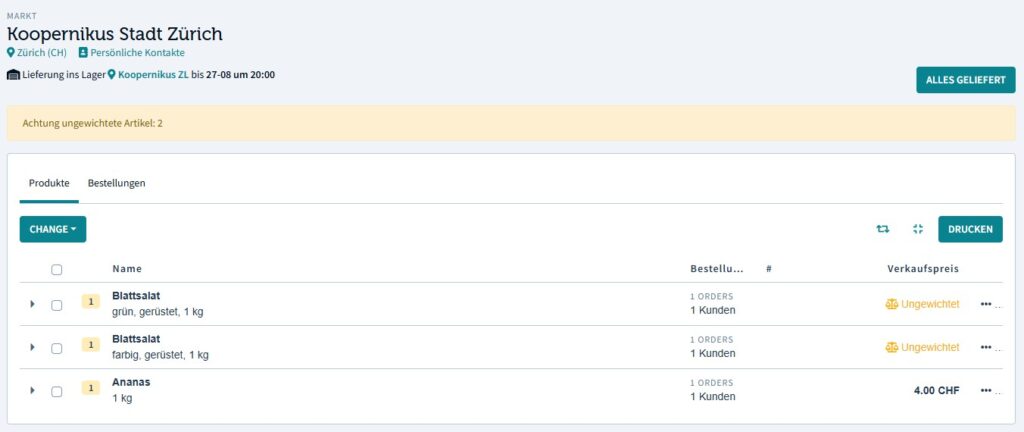
By products: Groups the information by product, expand to see the orders
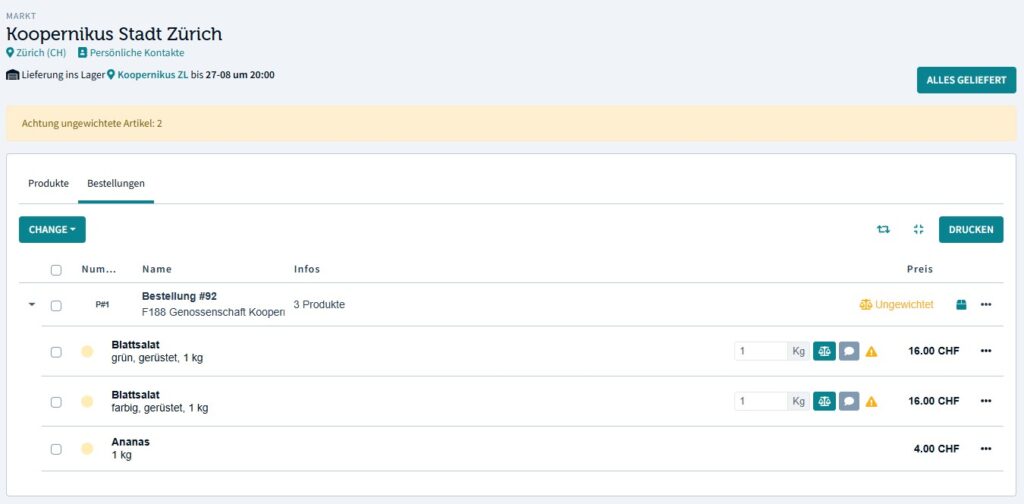
By orders: Groups the information by order, expand to see the products
Try both views and see for yourself which one suits your way of processing orders better.
Picking list and delivery notification #
Task 1: Before processing an order, you can print the picking list and delivery notifications by clicking on the print button in either the products table or order table.
The lists are described in the picking list and delivery list section.
Entering weights #
For products that are priced by weight unit, you have to enter the weight of the final shipped items.

There are two ways you can enter the final weight:
- Enter the weight directly in each order item row and confirm by clicking on the scale icon. A green checkmark indicates that the weight has been entered correctly, while a yellow warning triangle indicates that the weight has yet to be entered.
- By clicking on the speech bubble icon you can open a dialog box to enter the weight of the product along with a comment.
Task 2: After you have finished packaging the goods, please change the status of the order or the products to delivered. You can do this in one step by clicking the “everything delivered” button.
Product status #
Each order item line (whether viewed in the products or in the order table) has a colored indicator of the product status.
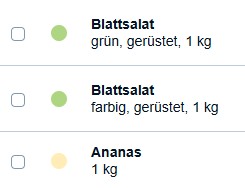
Understanding product status and the associated colors greatly helps you to have a good overview of what is going on with order. You can refer to the status cheat sheet to learn about status colors.
Task 3: After you have finished packaging the goods, please change the status of the order or the products to delivered. You can do this in one step by clicking the “everything delivered” button.

Box management #
Loonity offers the option to create boxes that are linked to a particular order. You cannot assign individual order items to a box. The box feature is used to track packaged boxes in downstream logistics. Distributors can then see the amount of boxes to expect when picking up and delivering an order.
Every box that has been created has a unique id. You can print a shipping label with a QR code of this id, the address and order number.
You can open the dialog for the box management by clicking on the box icon in the orders table.
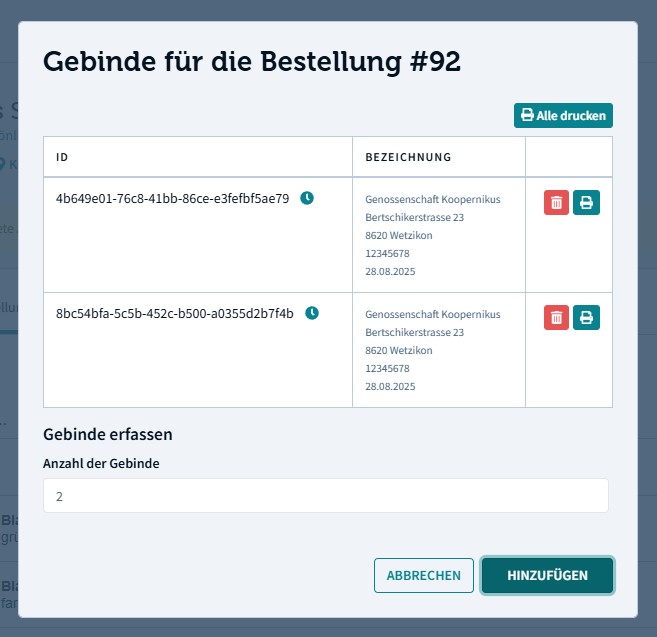
Task 4: After you have finished packaging the goods and changed the status, create the correct amount of boxes, print the shipping labels and stick them to each box.
Important: If you create a box by mistake or you create too many boxes, make sure to delete them again. Otherwise the distributor cannot plan with correct data and might select the wrong vehicle.